

Huginn is a system for building agents that perform automated tasks for you online. They can read the web, watch for events, and take actions on your behalf. Huginn's Agents create and consume events, propagating them along a directed graph. Think of it as a hackable version of IFTTT or Zapier on your own server. You always know who has your data. You do.

- Track the weather and get an email when it's going to rain (or snow) tomorrow ("Don't forget your umbrella!")
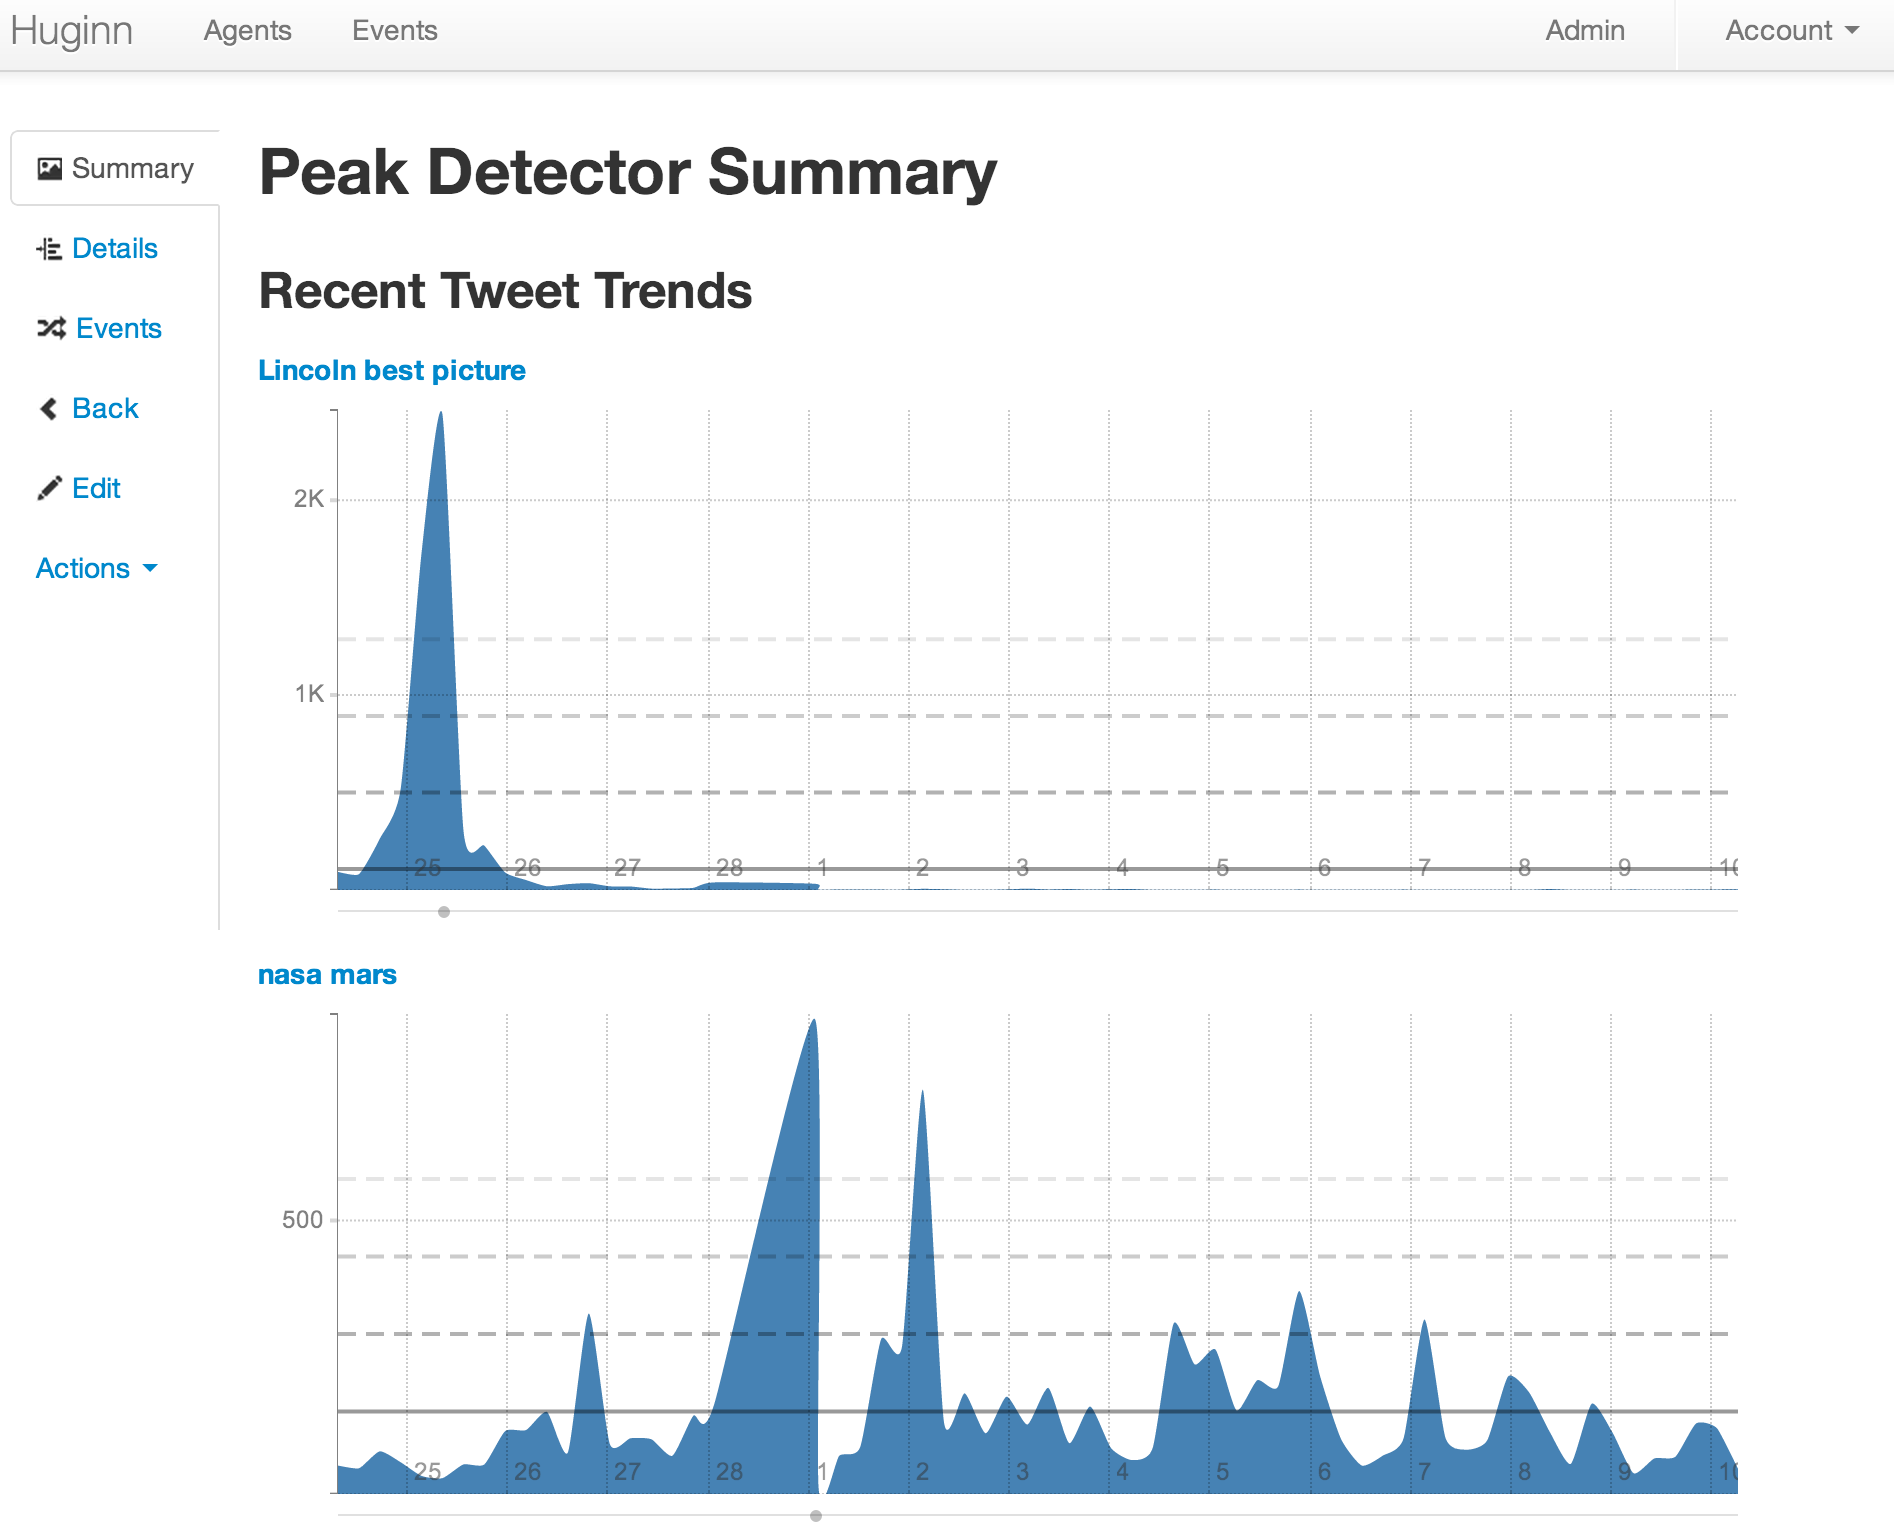
- List terms that you care about and receive email when their occurrence on Twitter changes. (For example, want to know when something interesting has happened in the world of Machine Learning? Huginn will watch the term "machine learning" on Twitter and tell you when there is a spike in discussion.)
- Watch for air travel or shopping deals
- Follow your project names on Twitter and get updates when people mention them
- Scrape websites and receive email when they change
- Connect to Adioso, HipChat, Basecamp, Growl, FTP, IMAP, Jabber, JIRA, MQTT, nextbus, Pushbullet, Pushover, RSS, Bash, Slack, StubHub, translation APIs, Twilio, Twitter, Wunderground, and Weibo, to name a few.
- Send digest email with things that you care about at specific times during the day
- Track counts of high frequency events and send an SMS within moments when they spike, such as the term "san francisco emergency"
- Send and receive WebHooks
- Run custom JavaScript or CoffeeScript functions
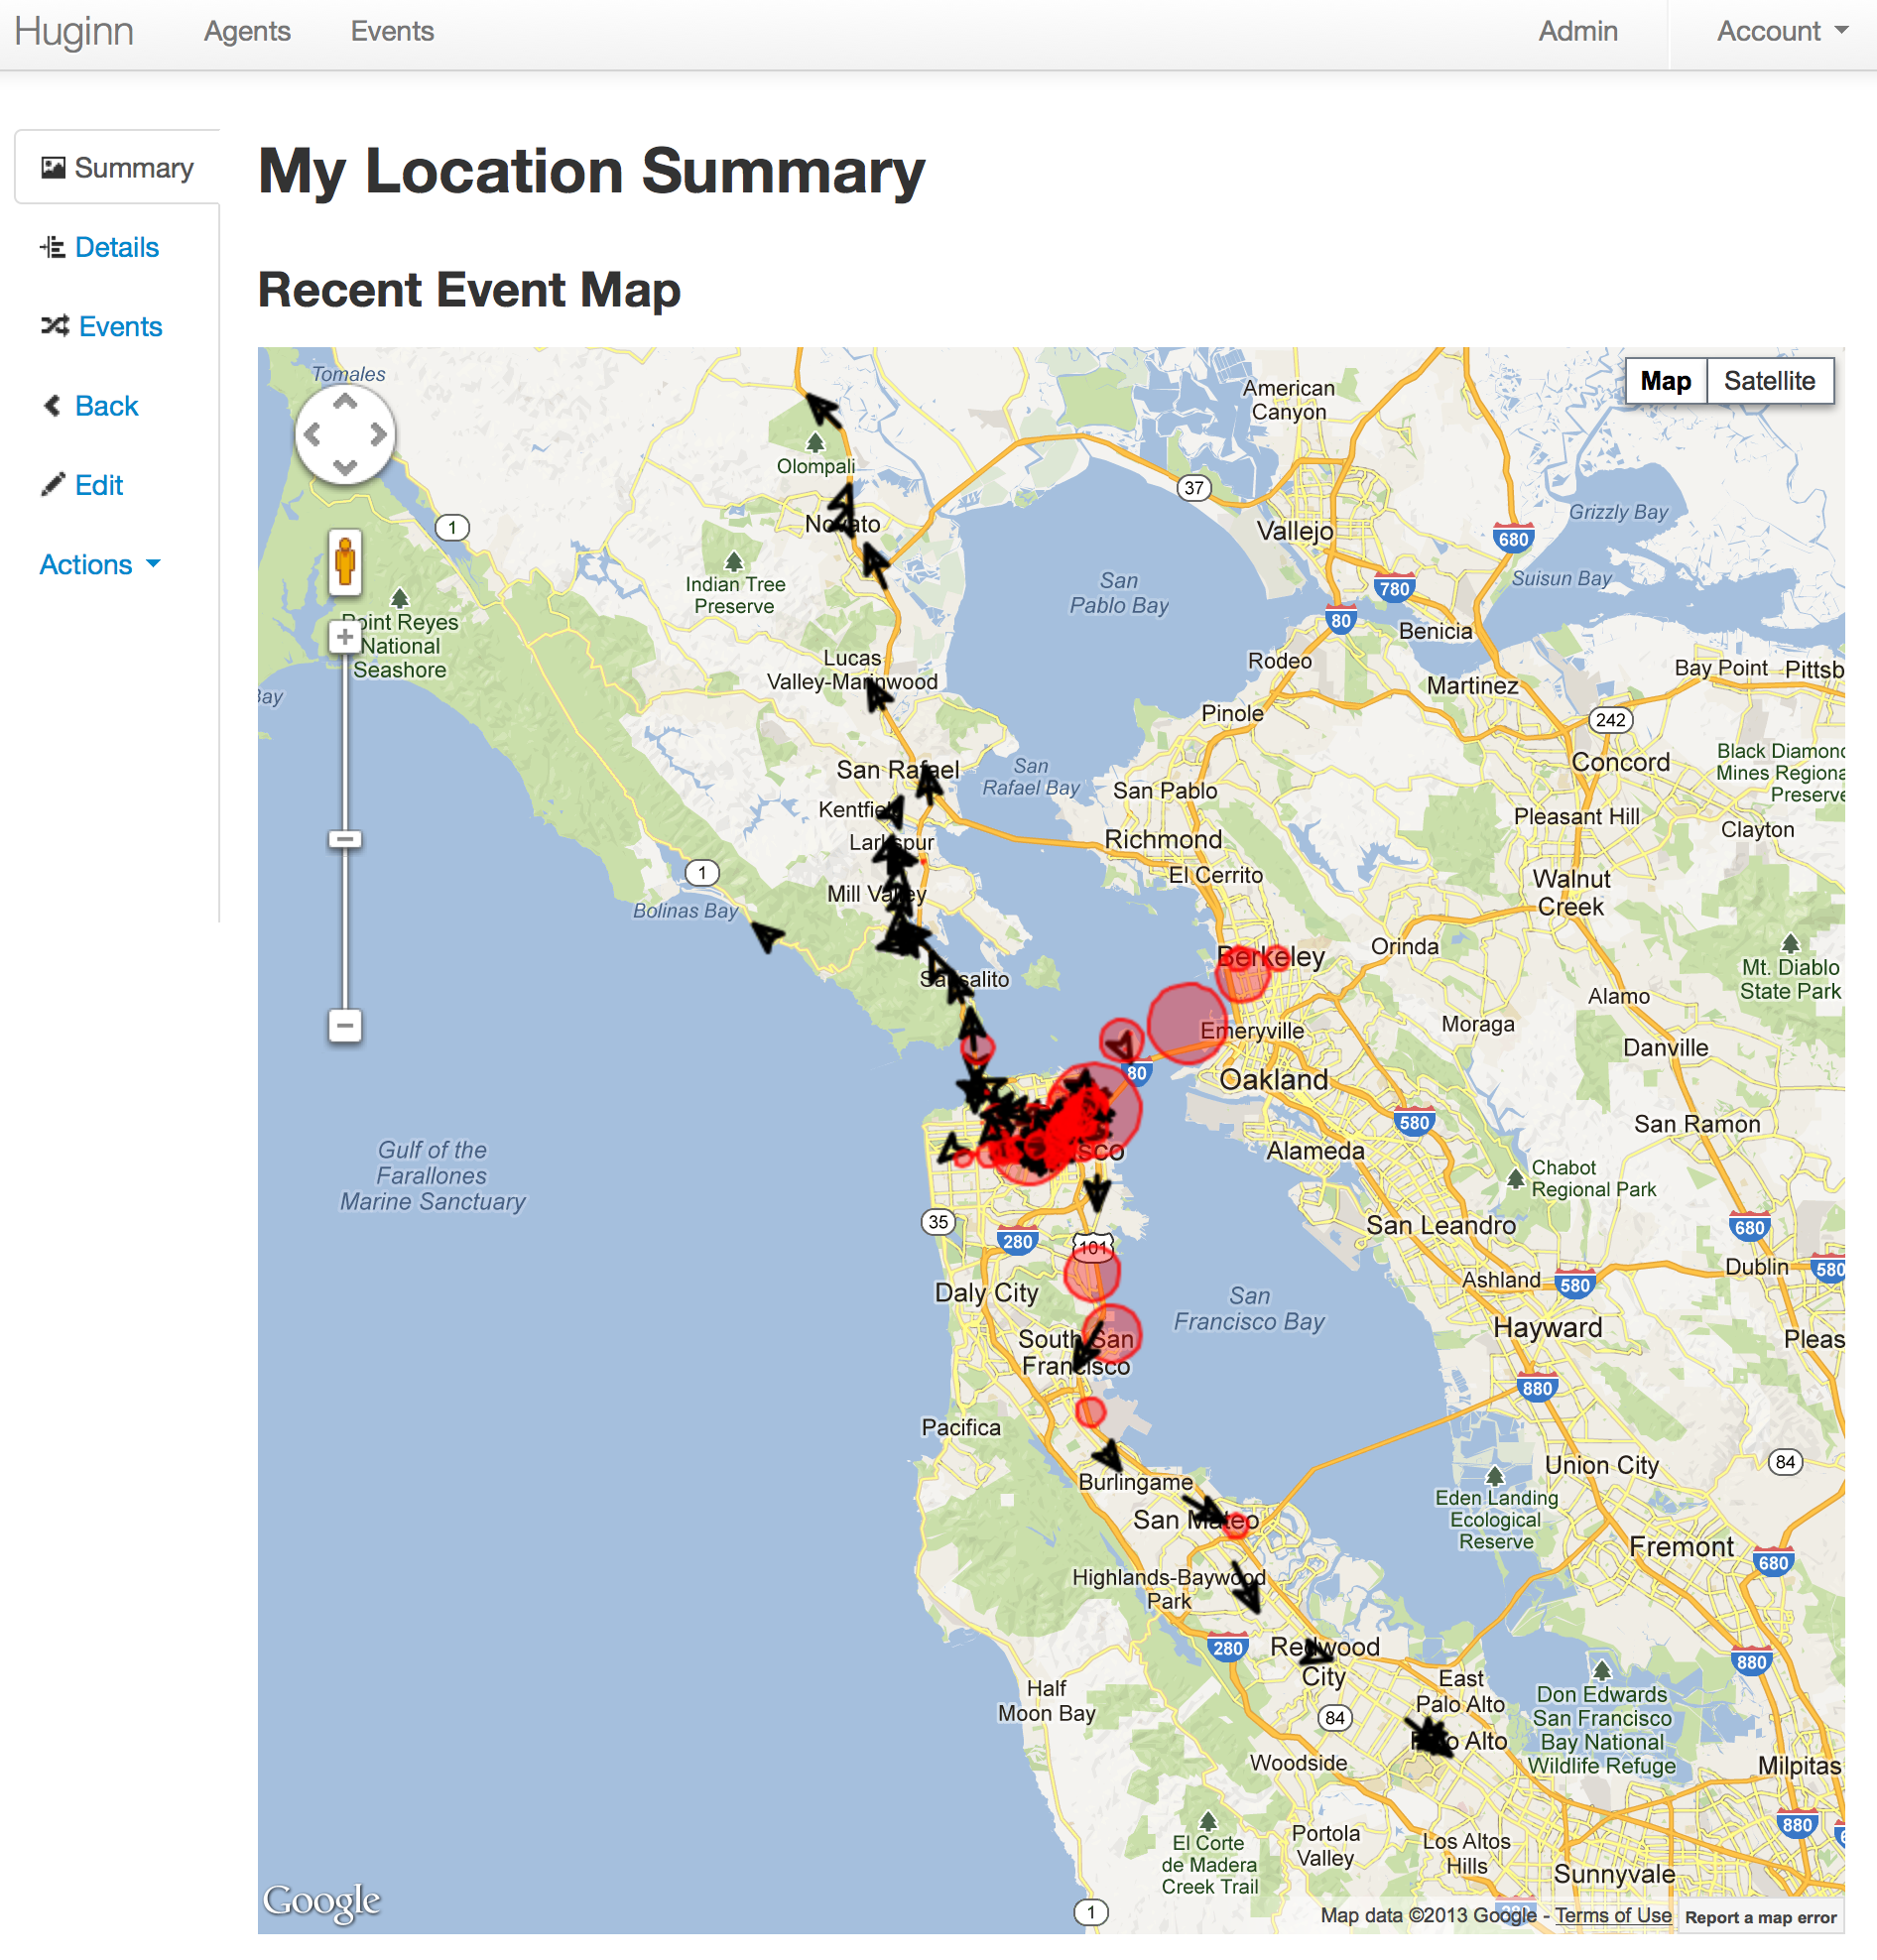
- Track your location over time
- Create Amazon Mechanical Turk workflows as the inputs, or outputs, of agents (the Amazon Turk Agent is called the "HumanTaskAgent"). For example: "Once a day, ask 5 people for a funny cat photo; send the results to 5 more people to be rated; send the top-rated photo to 5 people for a funny caption; send to 5 final people to rate for funniest caption; finally, post the best captioned photo on my blog."


Join us in our Gitter room to discuss the project.
Want to help with Huginn? All contributions are encouraged! You could make UI improvements, add new Agents, write documentation and tutorials, or try tackling issues tagged with #"help wanted". Please fork, add specs, and send pull requests!
Really want a fix or feature? Want to solve some community issues and earn some extra coffee money? Take a look at the current bounties on Bountysource.
Have an awesome idea but not feeling quite up to contributing yet? Head over to our Official 'suggest an agent' thread and tell us!
Please checkout the Huginn Introductory Screencast!
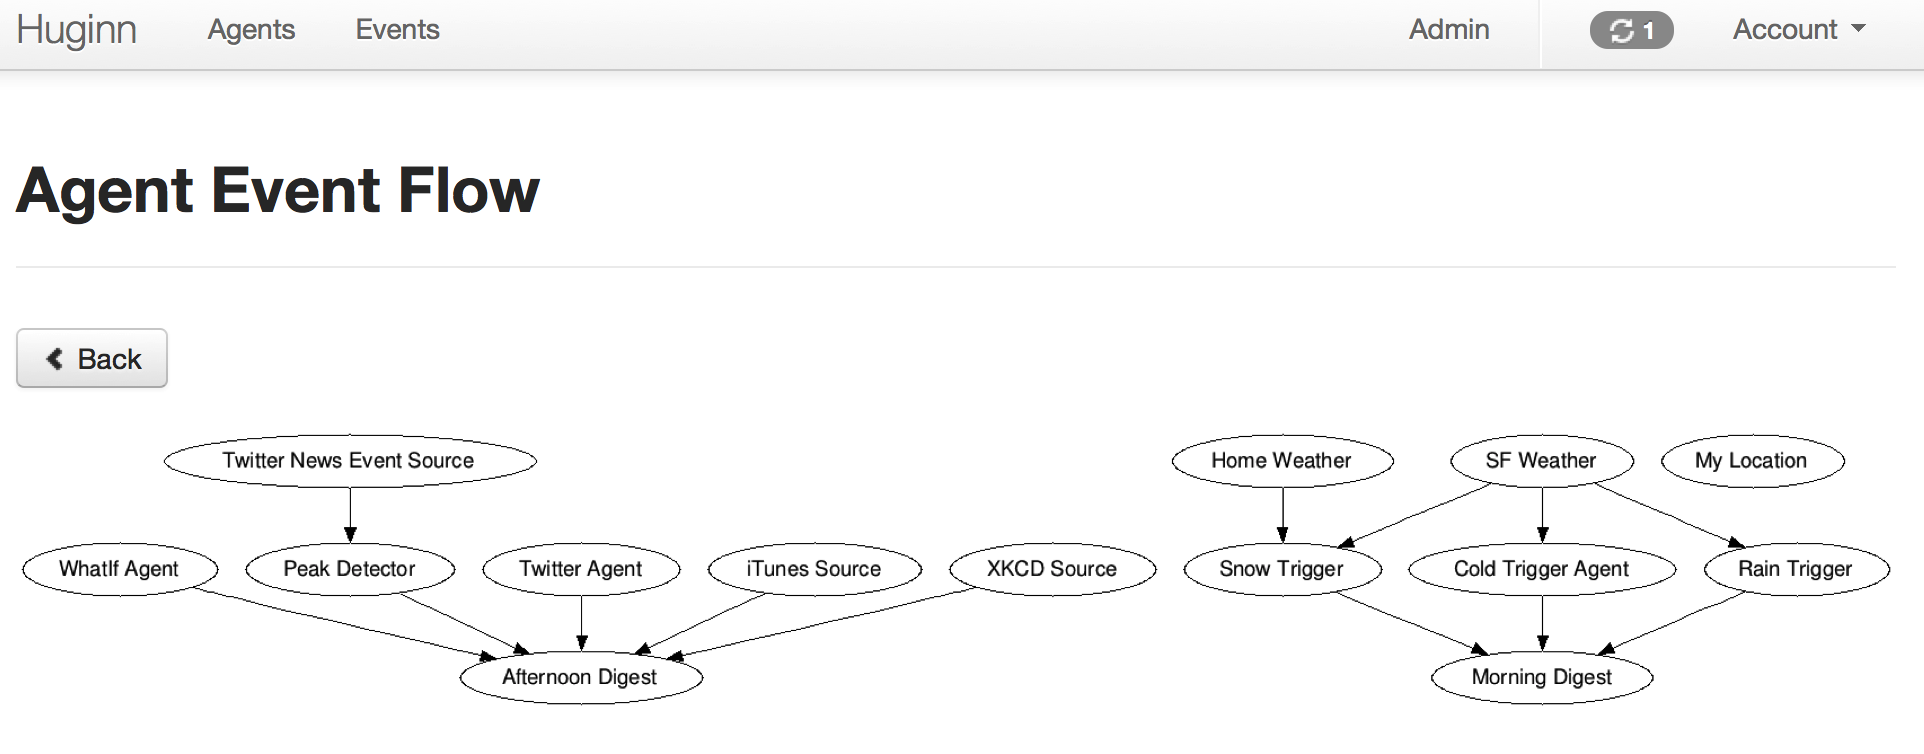
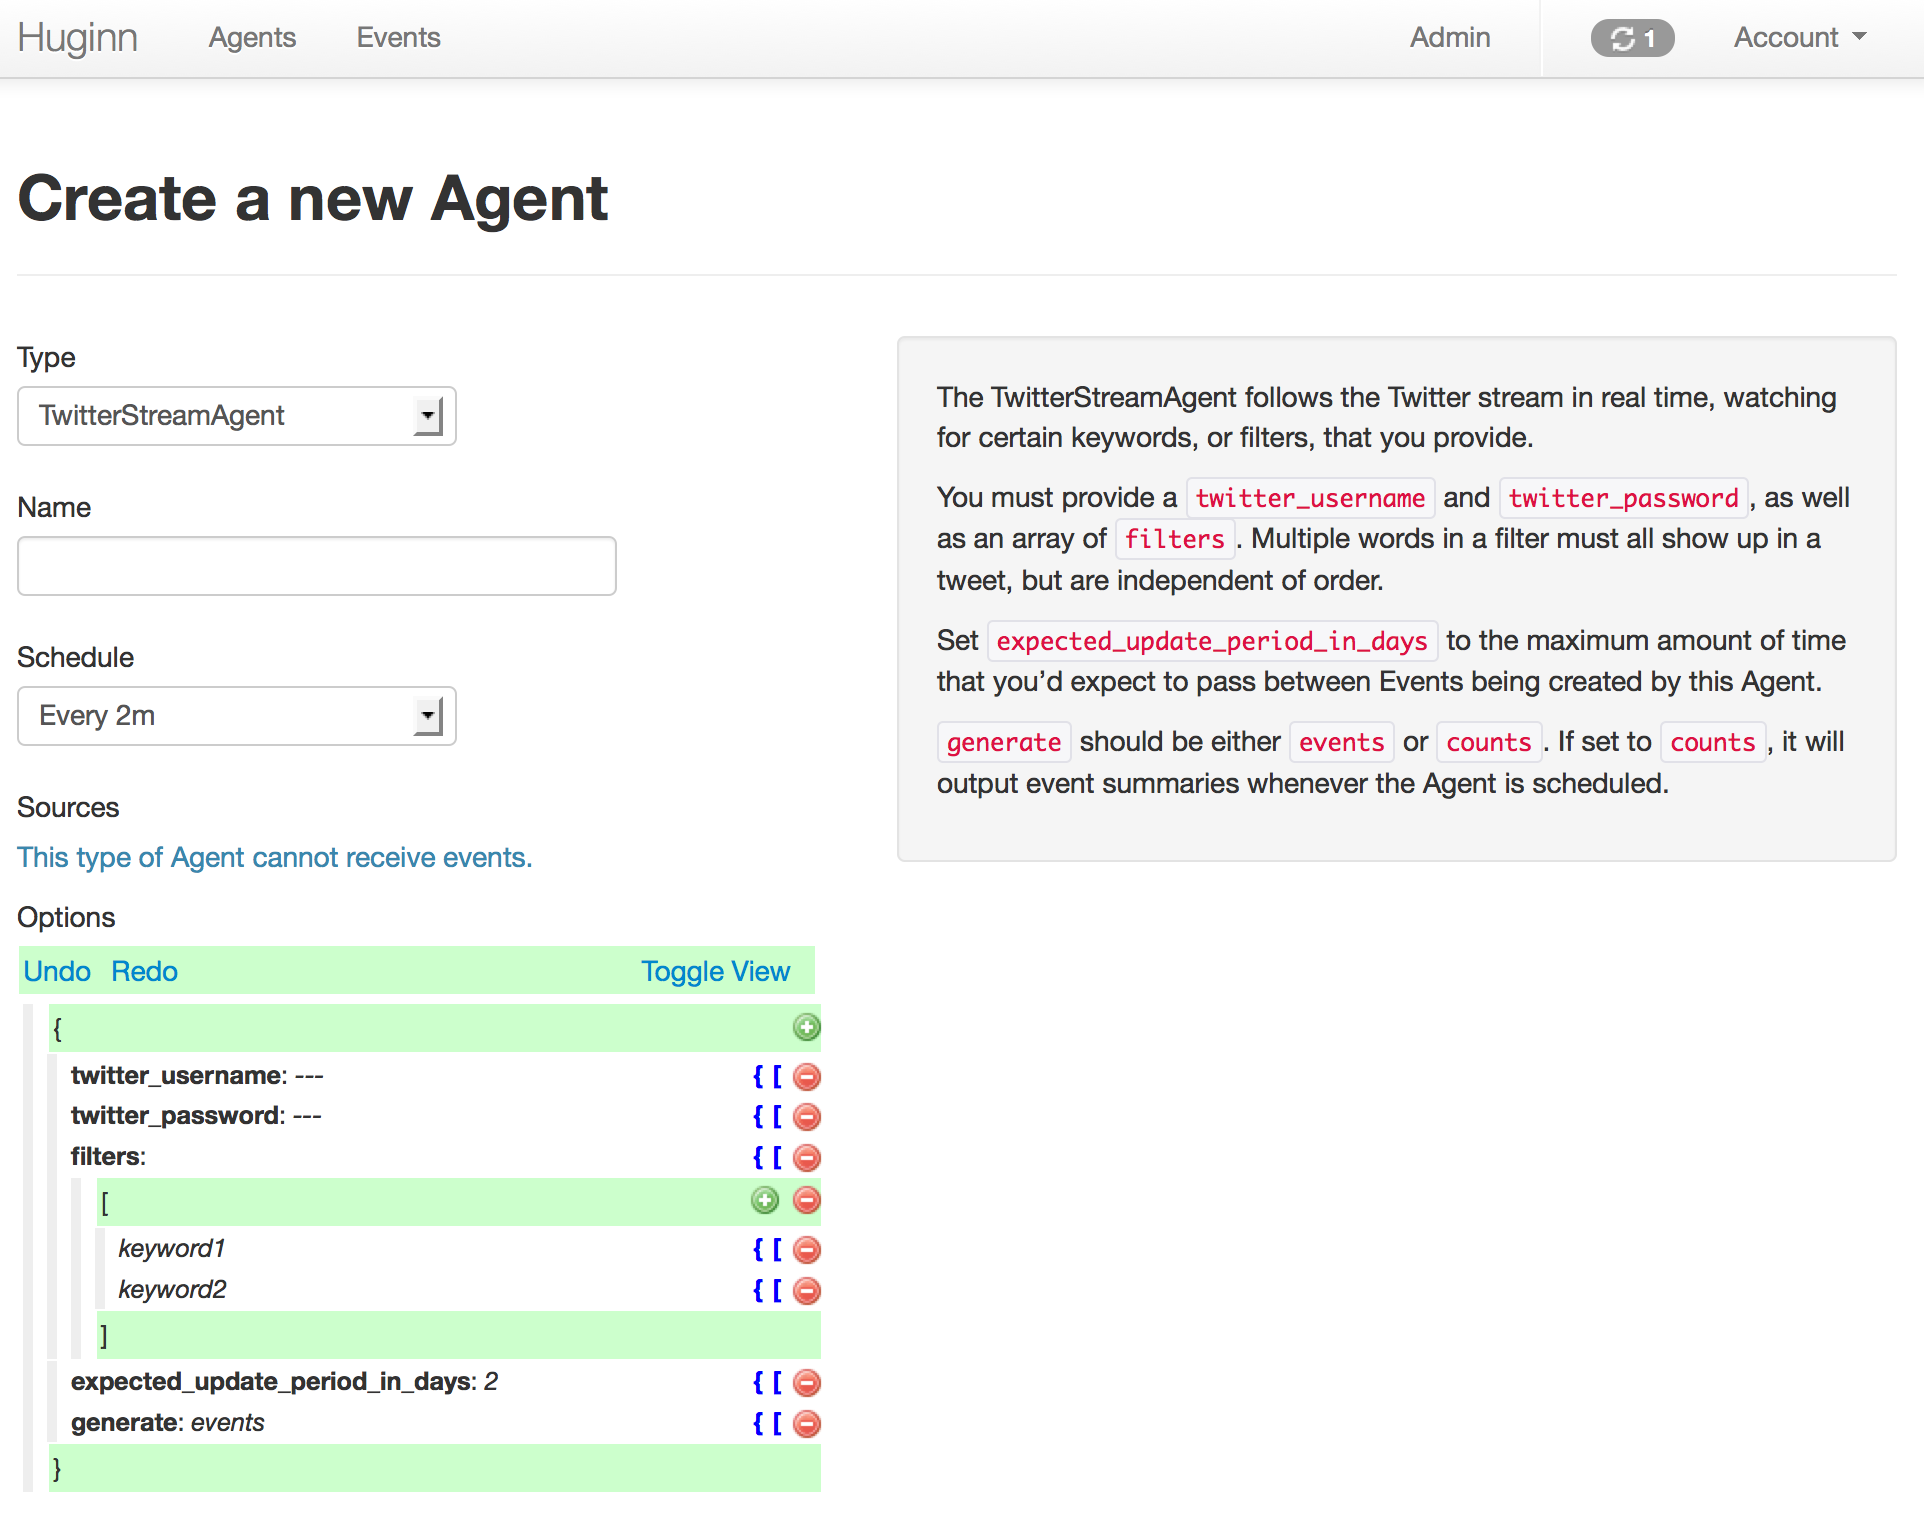
And now, some example screenshots. Below them are instructions to get you started.

The quickest and easiest way to check out Huginn is to use the official Docker image. Have a look at the documentation.
If you just want to play around, you can simply fork this repository, then perform the following steps:
- Run
git remote add upstream https://github.com/huginn/huginn.gitto add the main repository as a remote for your fork. - Copy
.env.exampleto.env(cp .env.example .env) and edit.env, at least updating theAPP_SECRET_TOKENvariable. - Make sure that you have MySQL or PostgreSQL installed. (On a Mac, the easiest way is with Homebrew. If you're going to use PostgreSQL, you'll need to prepend all commands below with
DATABASE_ADAPTER=postgresql.) - Run
bundleto install dependencies - Run
bundle exec rake db:create,bundle exec rake db:migrate, and thenbundle exec rake db:seedto create a development database with some example Agents. - Run
bundle exec foreman start, visit http://localhost:3000/, and login with the username ofadminand the password ofpassword. - Setup some Agents!
- Read the wiki for usage examples and to get started making new Agents.
- Periodically run
git fetch upstreamand thengit checkout master && git merge upstream/masterto merge in the newest version of Huginn.
Note: By default, email messages are intercepted in the development Rails environment, which is what you just setup. You can view
them at http://localhost:3000/letter_opener. If you'd like to send real email via SMTP when playing
with Huginn locally, set SEND_EMAIL_IN_DEVELOPMENT to true in your .env file.
If you need more detailed instructions, see the Novice setup guide.
All agents have specs! And there's also acceptance tests that simulate running Huginn in a headless browser.
- Install PhantomJS 2.1.1 or greater:
- Using Node Package Manager:
npm install phantomjs - Using Homebrew on OSX
brew install phantomjs
- Using Node Package Manager:
- Run all specs with
bundle exec rspec - Run a specific spec with
bundle exec rspec path/to/specific/test_spec.rb. - Read more about rspec for rails here.
Huginn Agents can now be written as external gems and be added to your Huginn installation with the ADDITIONAL_GEMS environment variable. See the Additional Agent gems section of .env.example for more information.
If you'd like to write your own Huginn Agent Gem, please see huginn_agent.
Our general intention is to encourage complex and specific Agents to be written as Gems, while continuing to add new general-purpose Agents to the core Huginn repository.
Please see the Huginn Wiki for detailed deployment strategies for different providers.
Try Huginn on Heroku: 
Huginn launches on the free version of Heroku with significant limitations. For non-experimental use, we strongly recommend Heroku's 1GB paid plan or our Docker container.
Try Huginn on OpenShift Online
Create a new app with either mysql or postgres:
oc new-app -f https://raw.githubusercontent.com/huginn/huginn/master/openshift/templates/huginn-mysql.jsonor
oc new-app -f https://raw.githubusercontent.com/huginn/huginn/master/openshift/templates/huginn-postgresql.jsonNote: You can also use the web console to import either json file by going to "Add to Project" -> "Import YAML/JSON".
If you are on the Starter plan, make sure to follow the guide to remove any existing application.
The templates should work on a v3 installation or the current v4 online.
Have a look at the installation guide.
See private development instructions on the wiki.
In order to use the WeatherAgent you need an API key with Wunderground. Signup for one and then change the value of api_key: your-key in your seeded WeatherAgent.
Note, Wunderground no longer offers free API keys. You can still use the WeatherAgent by setting the service key to darksky, and getting an API key from DarkSky.
We assume your deployment will run over SSL. This is a very good idea! However, if you wish to turn this off, you'll probably need to edit config/initializers/devise.rb and modify the line containing config.rememberable_options = { :secure => true }. You will also need to edit config/environments/production.rb and modify the value of config.force_ssl.
Huginn is provided under the MIT License.
Huginn was originally created by @cantino in 2013. Since then, many people's dedicated contributions have made it what it is today.


Huginn is packaged in two docker images.
huginn/huginn multiple process image
This image runs all processes needed by Huginn in one container, when the database is not linked it will also start MySQL internally. This is great to try huginn without having to set up anything, however maintenance and backups can be difficult.
huginn/huginn-single-process multiple container image
This image runs just one process per container and thus needs at least two container to be started, one for the Huginn application server and one for the threaded background worker. It is also possible to every background worker in a separate container to improve the performance. See the PostgreSQL docker-compose configuration for an example.
This image runs a linkable Huginn instance.
It was inspired by the official docker container for huginn
The scripts/init script generates a .env file containing the variables as passed as per normal Huginn documentation. The same environment variables that would be used for Heroku PaaS deployment are used by this script.
The scripts/init script is aware of mysql and postgres linked containers through the environment variables:
MYSQL_PORT_3306_TCP_ADDR
MYSQL_PORT_3306_TCP_PORT
and
POSTGRES_PORT_5432_TCP_ADDR
POSTGRES_PORT_5432_TCP_PORT
Its recommended to use an image that allows you to create a database via environmental variables at docker run, like postgresql or mysql, so the db is populated when this script runs.
Additionally, the database variables may be overridden from the above as per the standard Huginn documentation:
DATABASE_ADAPTER #(must be either 'postgresql' or 'mysql2')
DATABASE_HOST
DATABASE_PORT
If your database user does not have the permission to create the Huginn database please make sure it exists and set the DO_NOT_CREATE_DATABASE environment variable.
This script will run database migrations (rake db:migrate) which should be idempotent.
It will also seed the database (rake db:seed) unless this is defined:
DO_NOT_SEED
This same seeding initially defines the "admin" user with a default password of "password" as per the standard Huginn documentation.
You can customize the admin account name with the environment variable SEED_USERNAME and SEED_PASSWORD.
If you do not wish to have the default 6 agents, you will want to set the above environment variable after your initially deploy, otherwise they will be added automatically the next time a container pointing at the database is spun up.
The CMD launches Huginn via the scripts/init script. This may become the ENTRYPOINT later. It does take under a minute for Huginn to come up. Use environmental variables that match your DB's creds to ensure it works.
Simple startup using docker compose (you need to daemonize with -d to persist the data):
cd docker/single-process
docker-compose up
or if you like to use PostgreSQL:
docker-compose -f postgresql.yml up
Manual startup and linking to a MySQL container:
docker run --name huginn_mysql \
    -e MYSQL_DATABASE=huginn \
    -e MYSQL_USER=huginn \
    -e MYSQL_PASSWORD=somethingsecret \
    -e MYSQL_ROOT_PASSWORD=somethingevenmoresecret \
    mysql

docker run --rm --name huginn_web \
    --link huginn_mysql:mysql \
    -p 3000:3000 \
    -e DATABASE_NAME=huginn \
    -e DATABASE_USERNAME=huginn \
    -e DATABASE_PASSWORD=somethingsecret \
    huginn/huginn-single-process

docker run --rm --name huginn_threaded \
    --link huginn_mysql:mysql \
    -e DATABASE_NAME=huginn \
    -e DATABASE_USERNAME=huginn \
    -e DATABASE_PASSWORD=somethingsecret \
    huginn/huginn-single-process /scripts/init bin/threaded.rb
or alternatively:
docker run --rm --name huginn_threaded \
    --link huginn_mysql:mysql \
    -e DATABASE_NAME=huginn \
    -e DATABASE_USERNAME=huginn \
    -e DATABASE_PASSWORD=somethingsecret \
    -e WORKER_CMD='bin/threaded.rb' \
    huginn/huginn-single-process
Other Huginn 12factored environment variables of note are generated and put into the .env file as per Huginn documentation. All variables of the .env.example can be used to override the defaults which a read from the current .env.example.
For variables in the .env.example that are commented out, the default is to not include that variable in the generated .env file.
In newer versions of Docker you are able to pass your own .env file in to the container with the --env-file parameter.
You don't need to do this on your own, but if you really want run this command in the Huginn root directory:
bin/docker_wrapper build --rm=true --tag={yourname}/huginn -f docker/single-process/Dockerfile .
The source is available on GitHub.
Please feel free to submit pull requests and/or fork at your leisure.